Have you ever been overwhelmed by the thought of creating and sending multiple emails to multiple people?
Seeing as how inboxes full of emails seem to be the preferred topic of conversation for many folks, we’re sure all of us, at some point in our careers, have dreaded this.
But you can get around creating and sending multiple emails by using email groups. Email groups, as the name suggests, allow you to send group mail to numerous recipients all at once. Want to know more about it? Read on!
What Are Email Groups?
Email groups essentially help users develop an email list on Gmail (or other email service providers), so they can send emails in bulk. This helps members of an organization stay connected on a topic.
For example, if you’re developing a project with a team of seven members, you can easily go about making a group on Gmail and send them project updates.
Besides helping you manage tasks efficiently and communicate with team members, this also increases the productivity of your workday. Spending as little time as possible behind a mundane aspect of a project — like individually loading in the same contacts each time for each related email — this frees up more of your day for the creative, human-centric jobs to be done.
How to Create an Email Group in Gmail
If the idea of having your own email groups on Gmail has tickled your fancy, here’s how you can go about making them.
On desktop
Step 1: Begin by typing https://contacts.google.com in your browser and selecting “menu.” It’s possible that the menu option may be visible without clicking on any buttons.
Step 2: Click on the option that says “Create Label.”
Step 3: Add a label name and click on “save.” You can change the label name any time you want.
Step 4: Browse your contact list and add whoever you want to be added to the label.
Step 5: Once you’re done adding people, click the “manage label” icon on the top, select the project name, and press the “apply” button.
And voilà, you’re done creating a Gmail distribution list! If you wish to replicate this process on iPhone or Android, read on — we’ll guide you below.
On phones – on Android
Step 1: Download the Google Contacts app on your Android device, and click on the “menu” option.
Step 2: Once there, select “create label” and repeat the same steps as above by adding a name to your labels and clicking on “save.”
Step 3: Browse your contact list and add the necessary people to your project by clicking on the label icon.
Step 4: Click on “apply” or “okay.”
And that’s it — you’ve successfully created email groups on your phone too!
On phones – on iPhone
Unfortunately, the above method works for Android phones only. See what you should do to send an email to a group of contacts on iPhone.
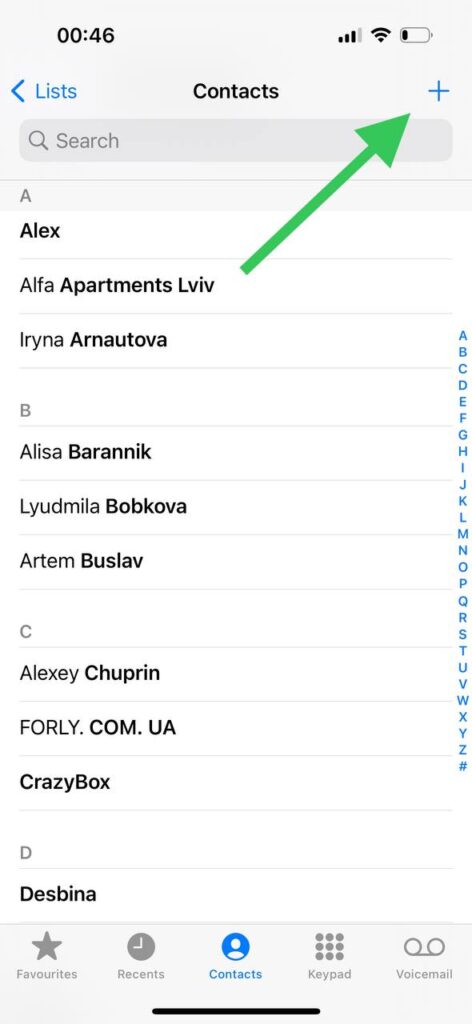
Step 1: Open the Contacts app on your device and click on the “+” icon to create a new contact.
Step 2: Instead of first and last names, insert the name of the group in the “Company” field.
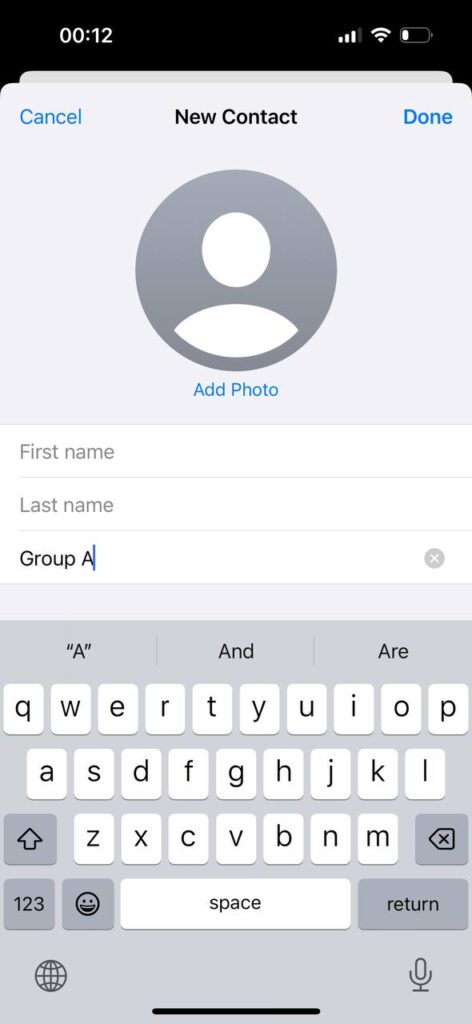
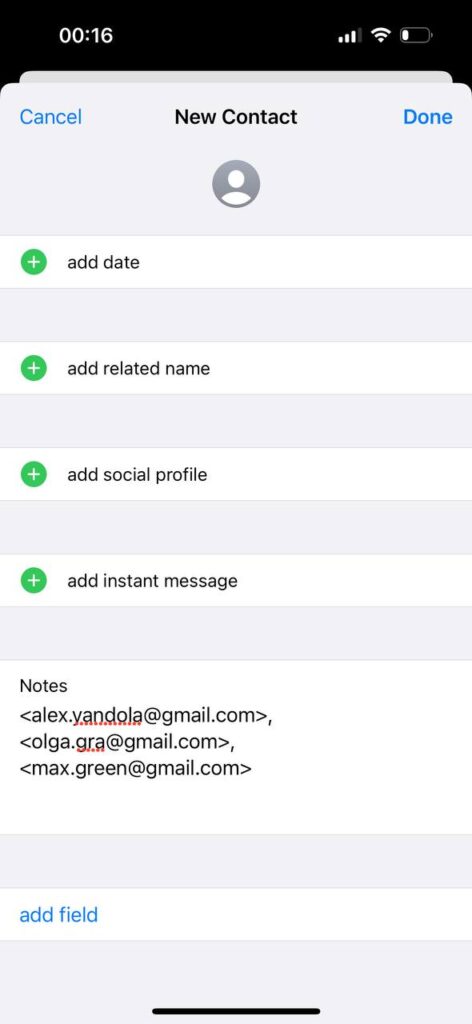
Step 3: Then scroll down to the “Notes” field and enter all the email addresses you want to include in this group. Note that you should do that in a specified format:
<[email protected]>, <[email protected]>, <name3@main_user>
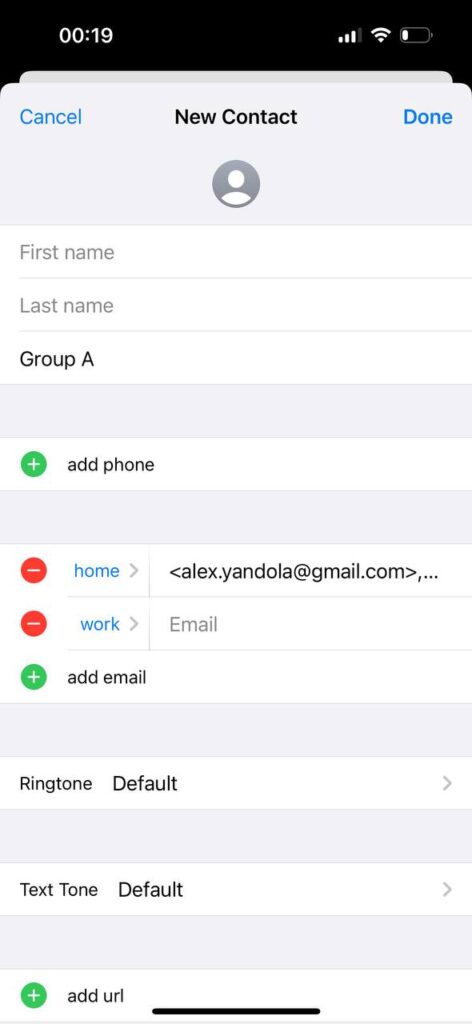
Once you’ve done this, highlight and copy the whole email list since you’ll need to enter it into the “Add email” field. You need this additional step because the field doesn’t allow using of “<“, “>” symbols.
Step 4: Insert the copied emails into the “Add email” field and press “Done.”
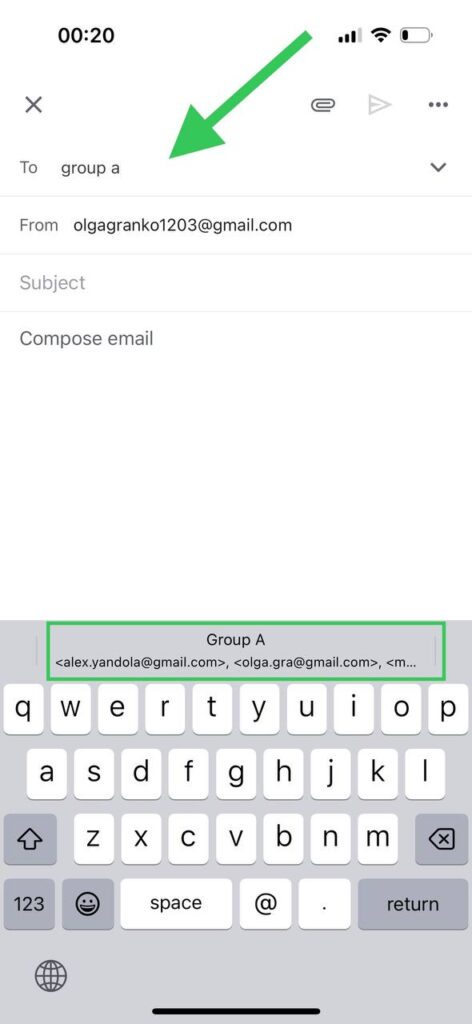
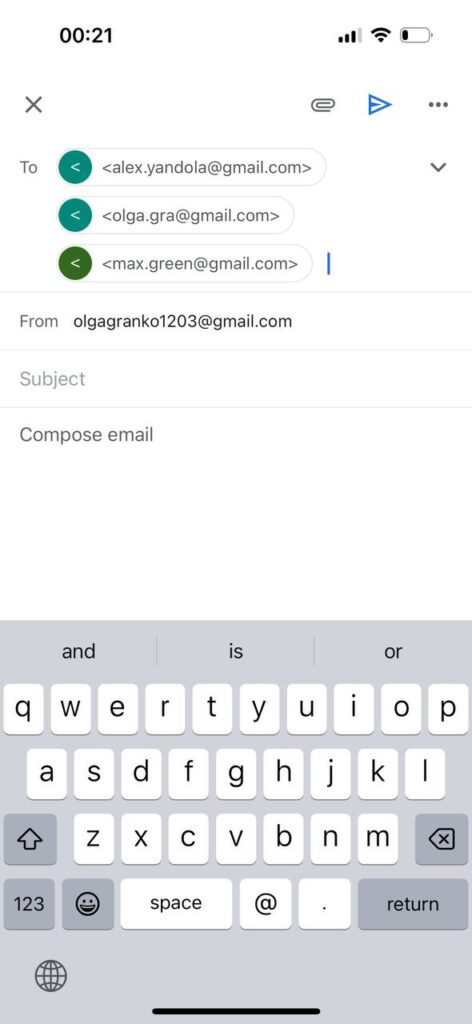
Step 5: Go to Gmail and press “Compose” to create a new email. In the “To” field, start typing the group name.
Step 6: Choose the group name and see how all the addresses will be added to the “To” field. Compose and send the email with text, survey form, or multimedia as always.
Different email service providers have different processes. You can look at how to create email groups in Outlook, Yahoo, and AOL here, here, and here. If you’re using an email automation service, they’ll usually have a step-by-step walkthrough on how to go about creating email lists and groups.
How to Manage Your Gmail Groups
Now that you’re successful in your “mailing list Gmail” mission — what are the next steps to manage your list and contacts?
Here are a few useful items you should note:
- You can edit label names and add and remove contacts as and when necessary.
- While there’s no requirement to add more than one contact to a label, the general benefit here is having multiple contacts under one label — but the number of people you choose is always up to you.
- To manage your workflows more effectively, we suggest creating pipelines. InboxCRM is a browser extension that is available for free and has advanced capabilities that allow you to customize fields and notes.
If you wish to create more productive workflows, then InboxCRM is the browser extension you should look at installing.
FAQs
-
Begin by going to contacts and creating a label. Give the label a name; once done, add contacts to the label and click on “save” or “okay.”
-
To create a distribution list, go to Google contacts > create label > add label name > add contacts to the label > select “save” or “apply.”
-
To send a group email in Gmail, you can simply add the group name of your label in the “to,” “cc,” or “bcc” section.
